
Introduction
When integrating a VPSA with Active Directory, it may be desirable to set share level permissions on the parent volume/share folder. This article describes the process for accomplishing this change.
Pre-Requisites
- The VPSA should be joined to Active Directory using the methods described in the VPSA Users Guide (AD authentication).
- These changes need to be performed with an Active Directory domain administrator account. You can verify who you're currently logged in as by running the command whoami in a command prompt.
- These changes were tested using Windows Server 2012 R2 working against a Window Server 2008 R2 Active Directory domain controller.
Folder Permissions
- Open the UNC root path of your VPSA. For example, Start->Run, then \\10.0.0.63. The root of the UNC can be found in the volume's properties in the VPSA GUI.
- Right click on the share, and click Properties.
- In order to edit the share permissions, the logged-in admin needs to be added as having full control to this share for the next step. Add the currently logged-in admin as having full control. For example, if the user udi is the logged-in domain admin, please see below screenshots for proper settings:
Note: intial ownership of the volume offered from the VPSA will be for root user and group!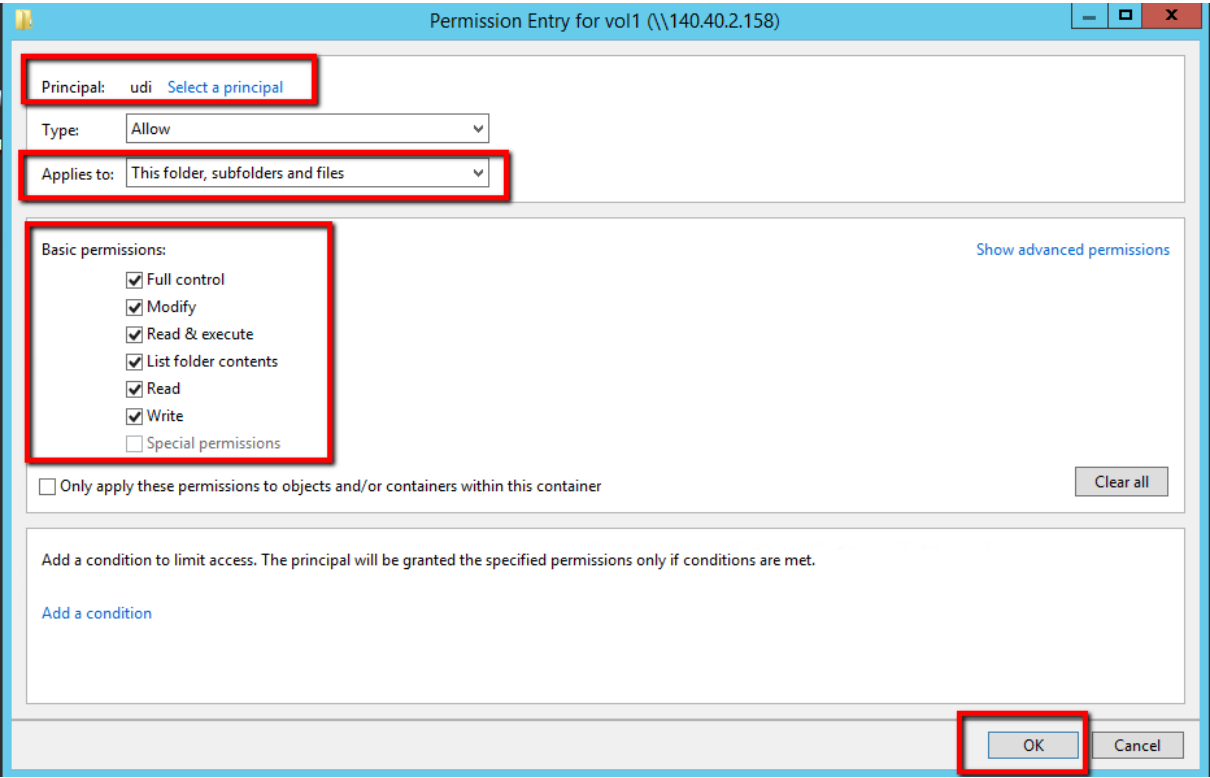
Share Permissions
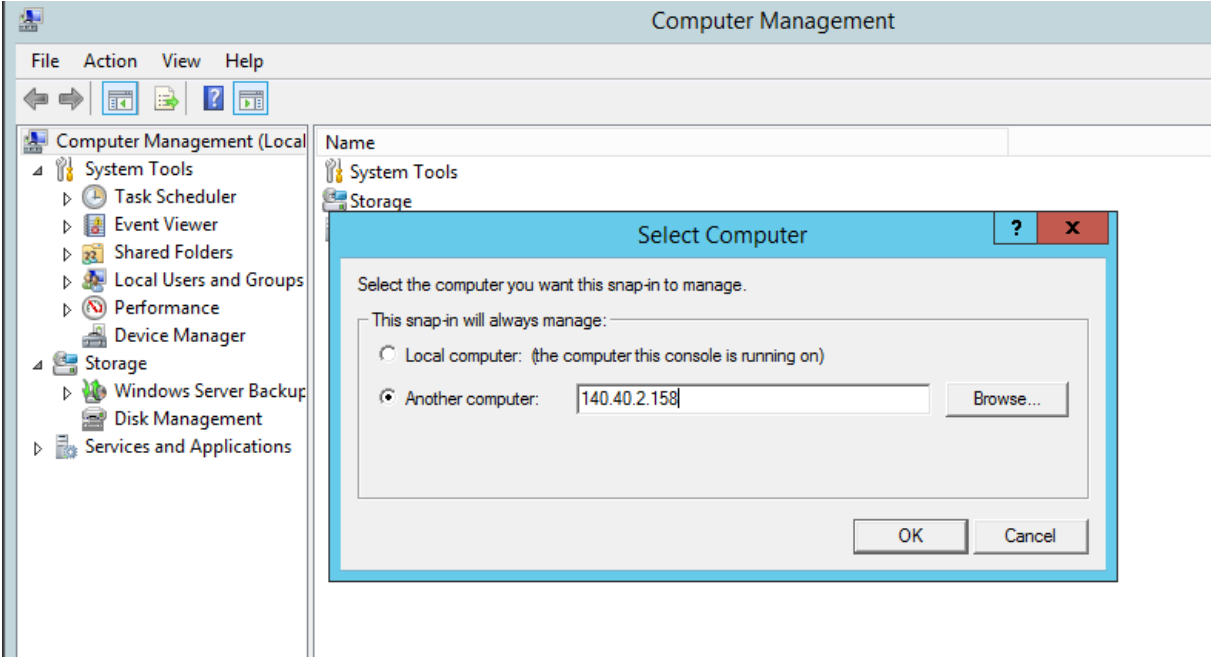
- Open the Computer Management MMC snap-in: Start->Run, then compmgmt.msc.
- Right click on the root label, Computer Management, then connect to the VPSA's IP address as shown in the screenshot below:
Go to Shared Folders->Shares as shown below:
- Right click on the share and click Properties, then add the needed user and correct permissions as shown below:

- Apply your changes and the permissions should now be set.
__________________________________________________________________________________________________________
Addenda
Should the above procedure not work for you then take ownership of the share first.
As before ...
- Open the UNC root path of your VPSA. For example, Start->Run, then \\10.0.0.63.
The root of the UNC can be found in the volume's properties in the VPSA GUI.
- Right click on the share, and click properties.
Then
1) Proceed to the Advanced Security Settings screen and take ownership of the folder first.
2) Re-apply the changes as detailed above under the Share Permissions section